Bob Gumpright was kind enough to share his
experiences in repairing/replacing the rudder thru-hull assembly on his 1978 C-22
"Ryan's Way". While the writeup and photos demonstrate the process for a
C-22, owners of the other Chrysler cruising boats (C-20 & C-26) with a
similar rudder configuration may be able to use this process as well.
For more information about how to repair the rudder and rudder post assembly,
check out the "how to" tutorial written by Raleigh Martin by clicking on this link:
While working to eliminate leaks from our Sail Club C-22, RYAN'S WAY, we decided to replace the rudder through hull. I researched the Chrysler 22 Yahoo! Groups discussion forum and found a lot of information on the rudder and post but little about the thru hull assembly. Soooooo....... after diving in and removing the existing fittings, we have successfully reassembled the unit. The following summarizes our efforts and the components on RYAN'S WAY. We are not certain that these steps will apply to all C-22's but figured a little knowledge is better than none.
The drawings of the rudder and post assembly posted on the web are accurate. Our post is a 1 1/2 inch solid post and the rudder is fixed in the down position. When dropping the post from the cockpit, we suggest removing the rudder from the post to ensure that there is clearance to get the post entirely removed from the hull without causing other damage. Our tiller retaining screws were corroded and took some "special effort" (hammer and chisel) to remove. The retaining ring also needed this unique process.
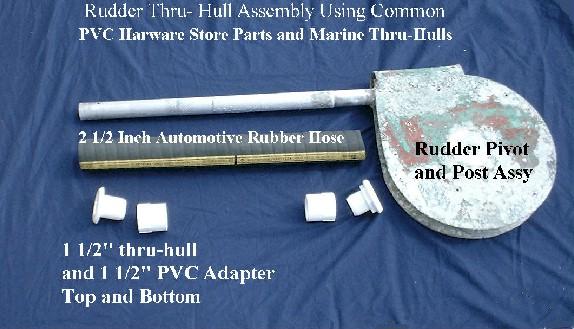
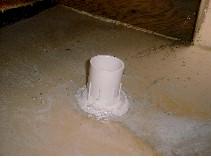
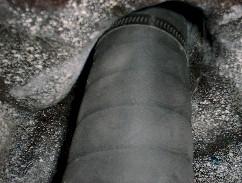
Our thru-hull assembly consisted of an upper and lower thru-hull type fitting connected by a hose with clamps. The clamps were rusted and the fittings were brittle. Removal of the assembly took little effort once the rudderpost was "dropped".
Access to the assembly is best from the aft port side crawl space under the seat.... I was a bit too broad in the beam to access from the starboard side.
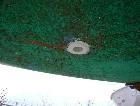
The thru-hulls could be unscrewed using channel lock pliers on the retaining nut/backing plate. (Ours just disintegrated) The thru-hulls that were installed were approx 1 3/4" that made a very sloppy rudder. We replaced with 1 1/2" thru-hulls but did ream them with a 1/1/2" hole saw to get the rudderpost to fit back through. We also used standard threaded PVC reduction couplings for additional support and to provide a firm attach point for a 2 1/4" rubber automotive hose with stainless steel clamps.
The steps to rebuild/re-install are:

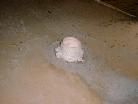
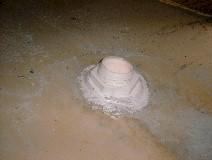

Once complete, check all connections and insert rudderpost thru the assembly from below. Secure using rudderpost and tiller hardware. We used a zinc anode to replace the retaining ring that needed special convincing to remove. Our rudderpost was worn on the bottom nearest the rudder and didn't fit as snuggly as we hoped.... Next time, we will rebuild to 1 1/2" with fiberglass resin to attain a better fit.
Hope this information is useful.
Smooth sailing,
Bob Gumpright - Navy Patuxent River Sail Club
Many thanks to Bob Gumpright for taking the time to write this "how to" tutorial and take these photographs! Bob and the Navy Patuxent Sail Club sails "Ryan's Way" on the Patuxent River and Chesapeake Bay in Maryland. If you would like to ask him any questions about this process, send an e-mail message to bobgump@netzero.net.