This page includes pictures of Chrysler owners raising & lowering the mast on their C-26 as well as links to the owner's manual drawings for the C-22 and C-26.
One of the areas within the Chrysler Owner's
Manual that is not very clear is the process for raising & lowering the mast.
Because of this, many owners have asked for photos of actual people
raising & lowering the mast on a Chrysler boat.
Ron & Sue Hatton were kind enough to snap a few photos as they were
raising & lowering the mast of their 1977 C-26 "Fantasy". While these
photos demonstrate the process for a C-26, owners of the other
Chrysler cruising boats (C-20 & C-22) can use this process as well.
Bob Wood was also kind enough to provide an easy method for raising the mast
on his C-26 "Southern Cross".
Michael Warchol, a C-22 owner, was kind enough to provide some additional
information regarding the mast raising bridles to enhance this how-to page.
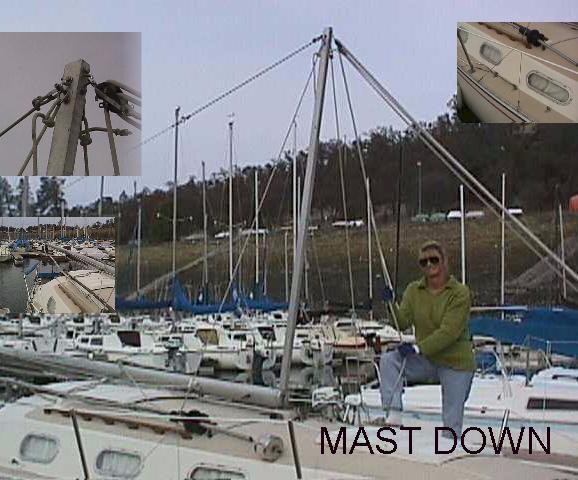
This first photo shows Sue lowering the mast. Also note the insets in this photo. These insets provide a view of the mast raising accessory as well as a deck level view of the various attachments the mast raising accessory is connected to. See the links to the manual(s) below for a more complete description of this procedure.
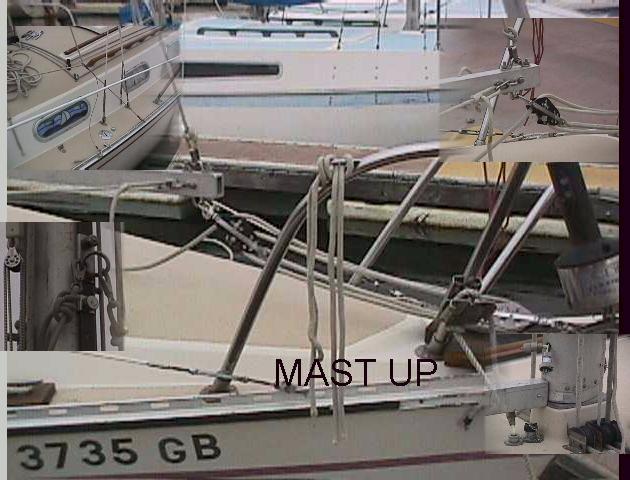
This second photo shows the mast being raised. The main view depicts the mast raising accessory and its attachments on the foredeck. Please see the insets in the photo which provide a deck level view. See the links to the manual(s) below for a more complete description of this procedure.
I had read Ron's article and it still looked too complex for me; my way seems more practical for my simple mind. Here's a brief description for you:
Item to Purchase:
Basically, you're making a bipod in lieu of the gin pole. Attach one end of the 2 X 4's together with the hinge using 1 1/2" screws. Using the six 2" bolts in an inverted 'V' pattern, mount the steel plates on the other ends of the 2 X 4's on the outboard sides with the plate extending about 3/4" beyond the 2 X 4 end. Place the bipod on the foredeck with the hinge-end just forward (by about an inch) of the forestay connection and the 2X4's extending aft along each side. Where the end of the steel plate touches the toe rail, mark the nearest rail slot on each side with electrical tape (make sure they are the same on both sides). Drill a 5/16" pivoting hole in the end of the steel plate, located 1/2" on-center from the end AND from the side facing the deck...do not center in the end of the plate or it won't pivot. Your manufacturing process is complete.
With the mast-base slot snugly over the connecting 'hook' and the spreader and aft side shrouds connected to the chain-plates (NOT the front side shrouds), slide the bipod back until the fore-stay deck fitting is INSIDE the hinged end. Tie securely to the hinged end (I use a 7" X 1/2" bolt through both 2X4's, behind the hinge, for additional security and something to tie the stay to, but that may be obsessive). Tie a dock-line to the end of the forestay and also another line connected to a rope-and-pulley or winch system of pulling (I use the boom vang). Raise the hinged end of the bipod in the air while sliding the plate-ends towards the tape-marked slots. Attach the plates to the toe-rail with the 3/4" X 1/4" bolts, washers & nuts. Attach your pulling system to the foremost centerline deck fitting.
Begin pulling on the mast, stopping every 3 feet or so to check on shroud/guy/stay/halyard/etc. freedom. Use the extra dock line hanging from the forestay to secure to a cleat while re-extending the boom-vang/pulley system purchase. After the mast is up about 65%, you can easily hand-pull it the rest of the way and fasten the forestay to its deck fitting.
Remove the two pivoting bolts and save the bipod for the next time. After a little experience, I can raise my C-26 mast, entirely on my own, in about 1 hour...and I'm 58! The mast, hanging beneath the bipod during the initial raising, is kept steady by gravity. As it comes up, the bipod pivots towards the fore-deck, and the side shrouds keep the mast from swinging too far to either side. (note: the mast can swing perhaps 6 or 7 ft but that's the limit that the shrouds will permit) You will also need something to support the mast when it's initially hanging off the stern before raising. I use a 9 ft. 2X4 on the launch ramp parking lot but if your boat is in the water, you'll probably need a volunteer.
It's a very simple and inexpensive system; the hardest part is in trying to write it down without any omissions. Anyhow, it works for me.
The following information is provided by Michael Warchol, a C-22 owner. This excerpt below details his mast raising bridles, and provides some ideas on how to develop your own bridles.
"The bridles I have are made from small diameter SS cable. They have a cable eye in the center and an eye at each end. The bridle forms two pigtails from the center eye, each about one foot long. Although it may be, I don' t think the actual measurement is critical. According to the owner's manual the bridle is to be mounted in the 23rd and 32nd rail slots -- mark these positions with nail polish or something similar... it beats counting the slots each time you mount the bridles. If you are going to do a lot of trailering, I would just leave them on. BTW the bridles are mounted to the genny rail with horseshoe clevises...the clevis pin goes through the rail slot.
My boat came with an additional "home brew" accessory which I think is really neat....a set of mast stabilizers. Instead of being forced to decipher the cryptic instructions for using the jib sheet/halyard to form suspension struts for the mast/gin pole, the previous owner fabricated a set of lines (4) with brass snap shackles on each end. Two lines are used on each side. One end of each line is snapped to the center eye on the bridle; the other end of line one is attached to the end of the boom. The final loose end is attached at the mast at a point about seven feet above the deck. These lines are not equal in length. The appropriate length for your boat is the length that is just taut between the attachment points. The length is easy to adjust as the lines are simply knotted to the shackles. My boat has bails on the mast and boom for attaching the lines. If yours does not, you can order the appropriate parts from Defender, et.al."
Below are links to the drawings in the C-22 and C-26 Owner's Manuals for raising & lowering the mast. For copies of the entire instructions, go to the "Manuals" page by clicking on the button in the left frame, then follow the links to the Owner's Manual for your hull.
Many thanks to the Hattons for taking the time
to take these photos! If you would like to ask them any questions about this
process, send an e-mail message to
the-hattons@email.msn.com.
Many thanks to Bob Wood for the mast raising information. If you would like
to ask him any questions about his method, send an e-mail message to
bobsal57@buffnet.net.
Many thanks to Michael Warchol for the mast raising bridle information.
If you would like to ask him any questions about his bridles, send an e-mail
message to mhw@ili.net.